


產品內容介紹
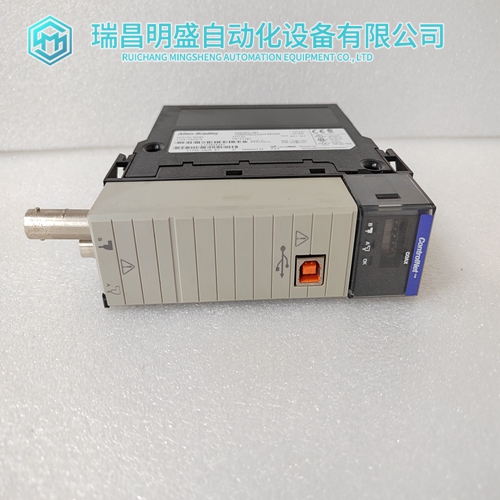
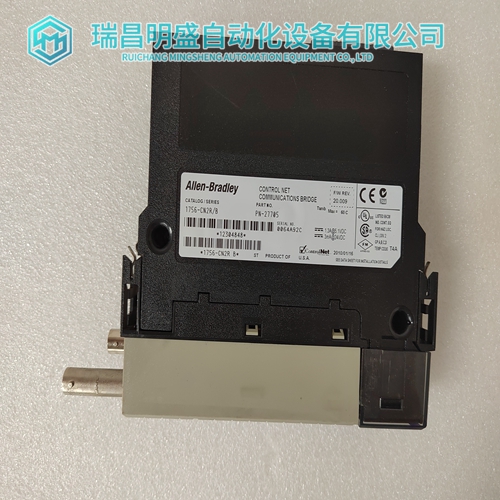
1756-CN2R/B通信模塊
PC輪詢模塊并將值放入輸入寄存器(30XXX)由程序員指定。每次模塊通電時,它都會執行診斷測試,重置輸入鎖存器,并且對于每個信道,向控制器呈現值0000。價值通電后約三秒鐘。
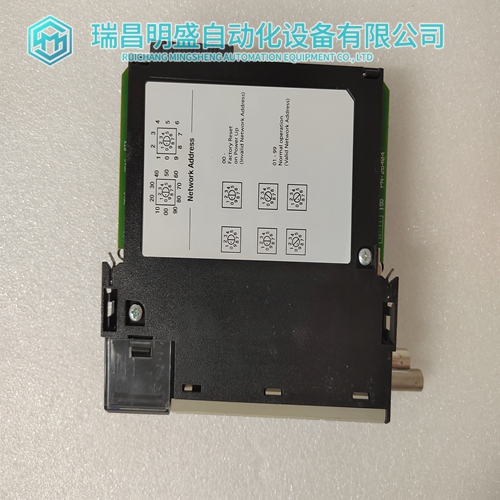
然后模塊將開始根據吞吐量中的計劃轉換輸入費率部分。開關設置模塊后部有一個DIP開關。開關1、2和4不習慣于開關3可以設置為模塊復位或模塊運行。它必須設置為模塊運行位置,以便模塊運行。確保設置了開關3將模塊插入外殼之前。DIP參考下圖開關設置。從盒子中取出模塊并檢查是否損壞。如果發現損壞,請聯系您的銷售人員或分銷商了解正確的退貨程序。
將開關3設置為模塊運行位置,將開關4設置為數據范圍在將模塊插入住房(請參閱第171頁的開關設置。)
單元特點下圖顯示了預安裝時的B873-012/B875-012模塊。模塊中包括一個模擬連接器組件(B873的部件號AS-8533-001-012和B875-012的零件號AS-8533-002)。
連接器套件包括兩個安裝螺釘、一個導線管和其中一個(B873-012)或兩個(B875-012)現場接線連接器。每個連接器有18個嵌入式開槽螺釘端子,可接受各種線規,但16至20建議現場接線使用儀表。接頭插入模塊,現場接線在左側。可拆卸的連接器允許在不干擾接線的情況下拆卸和更換模塊。
有關端子功能,請參閱端子編號圖。
導線管保護模擬輸入模塊的連接移除緊鄰其左側的模塊時損壞或松動。
下表介紹了B873-012導線管的安裝&B875-012模塊:步驟操作
1關閉殼體電源。
2確定模擬模塊將使用哪個插槽。*如果存在風管并且它與連接器集合中提供的不同,則必須將其移除。這通過拆除位于然后拉出導管。
3如果此插槽左側有一個模塊,則必須將其拆除,直到安裝管道已完成。
4將導線管插入兩個插槽之間,螺釘孔位于左側。(請參閱安裝圖。)
5使用包裝中提供的兩個1/4英寸開槽螺釘,將導線管固定至外殼。
6重新安裝模塊并完成接線連接。
*風管不能安裝在殼體最左側的槽中。因此,使用不建議使用此插槽的。
The PC polls the module
and places the values into input registers (30XXX) designated by the programmer. Each time the module is powered up, it performs diagnostic tests, resets the input latches, and, for each channel, presents a value of 0000 to the controller. The value is present for approximately three seconds after power up. The module will then start converting the inputs according to the schedule found in the Throughput Rate Section.Switch Settings There is a DIP switch located at the rear of the module. Switches 1, 2 and 4 are not used. Switch 3 can be set to either Module Reset or Module Run. It must be set to the Module Run position for the module to operate. Make sure you set Switch 3 before inserting the module into the housing. Refer to the figure below for DIP switch settings.Remove the module from the box and check for damage. If damage is found, contact your salesman or distributor for correct return procedure. Set Switch three to the Module Run position and Switch four to the data range selected for input - either Standard or Elevated - before inserting the module into the housing. (Refer to Switch Settings, p. 171.) Module Characteristics The following figure shows the B873-012 / B875-012 Module at pre-installation.
Included with the module
is an Analog Connector Set (Part# AS-8533-001 for B873- 012 and Part# AS-8533-002 for B875-012). The Connector Set consists of two mounting screws, a wire duct, and either one (B873-012) or two (B875-012) field wiring connectors. Each connector has eighteen recessed slotted screw terminals and can accept various wire gauges, but 16 to 20 gauge is recommended for the field side wiring.The connector plugs into the module with the field wiring to the left. The removable connector permits module removal and replacement without disturbing the wiring. Refer to diagram for Terminal Numbering, for terminal functions. The wire duct protects the connections to the Analog Input Module from being damaged or loosened when the module to it's immediate left is removed.
The following step table describes the installation of the Wire Duct, for the B873-012 & B875-012 Modules: Step Action 1 Turn off the power to the housing. 2 Determine which slot will be used for the Analog Module.* If there is a duct present and it is different from the one provided in the connector set, then it must be removed.This is accomplished by removing the two screws located on the top and bottom of the housing and then pulling the duct out. 3 If there is a module to the left of this slot, it must be removed until installation of the duct is complete. 4 Insert the wire duct between the two slots with the screw holes to the left. (Refer to the Installation Diagram.) 5 Using the two 1/4 inch slotted screws provided in the package, secure the wire duct to the housing. 6 Re-install the module(s) and complete the wiring connections. * The duct cannot be installed for the left-most slot of the housing. Therefore the use of this slot for the Analog Module is not recommended.
")
")
公司主營產品圖展示
")
產品優勢
1:國外專業的供貨渠道,具有價格優勢
2:產品質量保證,讓您售后無憂
3:全國快遞包郵
4:一對一服務
公司主營范圍簡介
PLC可編程控制器模塊,DCS卡件,ESD系統卡件,振動監測系統卡件,汽輪機控制系統模塊,燃氣發電機備件等,優勢品牌:Allen Bradley、BentlyNevada、ABB、Emerson Ovation、Honeywell DCS、Rockwell ICS Triplex、FOXBORO、Schneider PLC、GE Fanuc、Motorola、HIMA、TRICONEX、Prosoft等各種進口工業零部件、歐美進口模塊。
產品廣泛應用于冶金、石油天然氣、玻璃制造業、鋁業、石油化工、煤礦、造紙印刷、紡織印染、機械、電子制造、汽車制造、塑膠機械、電力、水利、水處理/環保、鍋爐供暖、能源、輸配電等等