


產(chǎn)品細(xì)節(jié)介紹
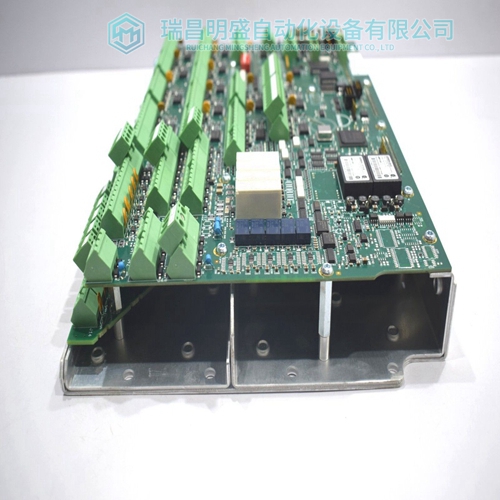
METTLER TOLEDO 78S300000B00000 5622698-5MK控制器
本節(jié)介紹如何配置和安裝NTAI06。所需程序?yàn)椋涸O(shè)置跳線、安裝將終端裝置連接至現(xiàn)場(chǎng)終端面板,并連接現(xiàn)場(chǎng)布線和終端電纜。有兩個(gè)NTAI06的修訂版。A版硬件(組件號(hào)6639364A1)有一個(gè)保險(xiǎn)絲F17。B版硬件(組裝號(hào)6639365B1)有額外的濾波電容器。每個(gè)NTAI06終端裝置都有一對(duì)電阻溫度檢測(cè)器(RTD),用于測(cè)量現(xiàn)場(chǎng)接線至接線板連接。這個(gè)溫度是用于補(bǔ)償熱電偶輸入的冷端效應(yīng)。使用內(nèi)置冷端參考時(shí),終端裝置蓋應(yīng)就位。封面包含兩個(gè)接線板和RTD。它有助于保持接線板和RTD周圍的溫度相同。將兩者保持在相同的溫度下可獲得最大的精度熱電偶輸入。在以下情況下,請(qǐng)始終保持罩蓋打開熱電偶輸入連接時(shí)的操作。提到跳線設(shè)置。電源接線
本節(jié)介紹如何連接電源線。NTAI06有兩個(gè)電源和I/O公共快速連接。那里是電路板邊緣上的機(jī)箱接地點(diǎn)電源和接地接頭之間。一個(gè)螺釘和外部星形墊圈將機(jī)箱公共點(diǎn)連接到NFTP01。安裝TU后,連接TU電源在NFTP01中。確保機(jī)柜和I/O電源已關(guān)閉
連接地線和電源線之前要更換終端裝置:
1.關(guān)閉INFI 90機(jī)柜電源或拔下從屬設(shè)備MMU背板上的模塊。
注:為TU供電的I/O電源可能不要與TU位于同一機(jī)柜中。確保轉(zhuǎn)動(dòng)關(guān)閉提供I/O電源的任何外部電源的電源。
2.拆下四個(gè)尼龍螺釘,然后拆下RTD蓋。
3.標(biāo)記并拆除接線板上的所有現(xiàn)場(chǎng)接線。
4.標(biāo)記并斷開連接至TU的所有電纜。
5.標(biāo)記并斷開系統(tǒng)I/O電源和接地端子。
6.卸下將TU固定至現(xiàn)場(chǎng)終端面板的兩顆螺釘和機(jī)箱通用螺釘,然后卸下周二。
7.根據(jù)安裝將跳線安裝到新TU上說明書驗(yàn)證替換TU.8上的跳線。將電路板的凸耳插入正確的插槽現(xiàn)場(chǎng)終端面板支座和滑動(dòng)電路板就位。
9.用兩個(gè)螺釘將終端裝置電路板固定到現(xiàn)場(chǎng)終端面板上。不要擰得過緊。
10.安裝底盤接地螺釘和10號(hào)外部螺釘星形墊圈。不要擰得過緊。
11.重新連接步驟2中拆除的所有現(xiàn)場(chǎng)接線。
12.重新連接系統(tǒng)I/O電源線和系統(tǒng)接地在步驟3中拆下導(dǎo)線并驗(yàn)證連接。
13.重新連接步驟4中拆下的所有電纜。
14.更換RTD蓋和四個(gè)尼龍螺釘。不要過度擰緊。
15.接通機(jī)柜電源,為TU。
16.打開所有提供I/O電源的外部電源。
17.將從模塊插入MMU背板。
SETUP/INSTALLATION
This section explains how to configure and install the NTAI06. The required procedures are: setting the jumpers, mounting the termination unit to the field termination panel and connecting the field wiring and termination cables. There are two revisions of the NTAI06. Revision A hardware (assembly number 6639364A1) has a fuse F17. Revision B hardware (assembly number 6639364B1) has additional filter capacitors. Each NTAI06 termination unit has a pair of resistance temperature detectors (RTDs) which measure the local temperature of the field wire to terminal block connection. This temperature is used to compensate for the cold junction effect on thermocouple inputs. When using the built-in cold junction reference, the termination unit cover should be in place. The cover encloses both the terminal blocks and the RTDs. It helps maintain the same temperature around the terminal blocks and the RTDs. Maintaining both at the same temperature allows maximum accuracy for thermocouple inputs. Always keep the cover on during operation when thermocouple inputs are connected. Refer to Jumper Settings.
Power Wiring
This section explains how to connect power wiring. The NTAI06 has two fast-on connections for power and I/O common. There is a chassis ground point on the edge of the circuit board between the power and ground connectors. A screw and external star washer connect the chassis common point to the NFTP01. Make power connections to the TU after it is mounted in the NFTP01. Make sure cabinet and I/O power are turned off before connecting ground and power wiring
To replace a termination unit
Turn OFF the INFI 90 cabinet power or unplug the slave module from the MMU backplane. NOTE: The I/O power supplies providing the power to the TU may not be located in the same cabinet as the TU. Make sure to turn OFF power to any external supplies providing I/O power. 2. Remove the four nylon screws and remove the RTD cover. 3. Label and remove all field wiring from the terminal blocks. 4. Label and disconnect all cables connected to the TU. 5. Label and disconnect system I/O power and ground from the terminals. 6. Remove the two screws securing the TU to the field termination panel and the chassis common screw and remove the TU. 7. Install the jumpers on the new TU according to installation instructions. Verify the jumpers on the replacement TU.
8. Insert the tabs of the circuit board into the proper slots of the field termination panel standoff and slide the circuit board into position. 9. Secure the termination unit circuit board to the field termination panel with two screws. Do not overtighten. 10. Install the chassis ground screw and number 10 external star washer. Do not overtighten. 11. Reconnect all field wiring removed in Step 2. 12. Reconnect the system I/O power wires and system ground wires removed in Step 3 and verify connections. 13. Reconnect all cables removed in Step 4. 14. Replace the RTD cover and the four nylon screws. Do not overtighten. 15. Energize the cabinet power supply that provides power to the TU. 16. Turn on any external power supplies providing I/O power. 17. Plug in the slave module to the MMU backplane.
")
")
公司主營產(chǎn)品圖展示
")
產(chǎn)品優(yōu)勢(shì)
1:國外專業(yè)的供貨渠道,具有價(jià)格優(yōu)勢(shì)
2:產(chǎn)品質(zhì)量保證,讓您售后無憂
3:全國快遞包郵
4:一對(duì)一服務(wù)
公司主營范圍簡介
PLC可編程控制器模塊,DCS卡件,ESD系統(tǒng)卡件,振動(dòng)監(jiān)測(cè)系統(tǒng)卡件,汽輪機(jī)控制系統(tǒng)模塊,燃?xì)獍l(fā)電機(jī)備件等,優(yōu)勢(shì)品牌:Allen Bradley、BentlyNevada、ABB、Emerson Ovation、Honeywell DCS、Rockwell ICS Triplex、FOXBORO、Schneider PLC、GE Fanuc、Motorola、HIMA、TRICONEX、Prosoft等各種進(jìn)口工業(yè)零部件、歐美進(jìn)口模塊。
產(chǎn)品廣泛應(yīng)用于冶金、石油天然氣、玻璃制造業(yè)、鋁業(yè)、石油化工、煤礦、造紙印刷、紡織印染、機(jī)械、電子制造、汽車制造、塑膠機(jī)械、電力、水利、水處理/環(huán)保、鍋爐供暖、能源、輸配電等等